
Install RHEL 10 Step by Step: From ISO to a Verified Server Baseline
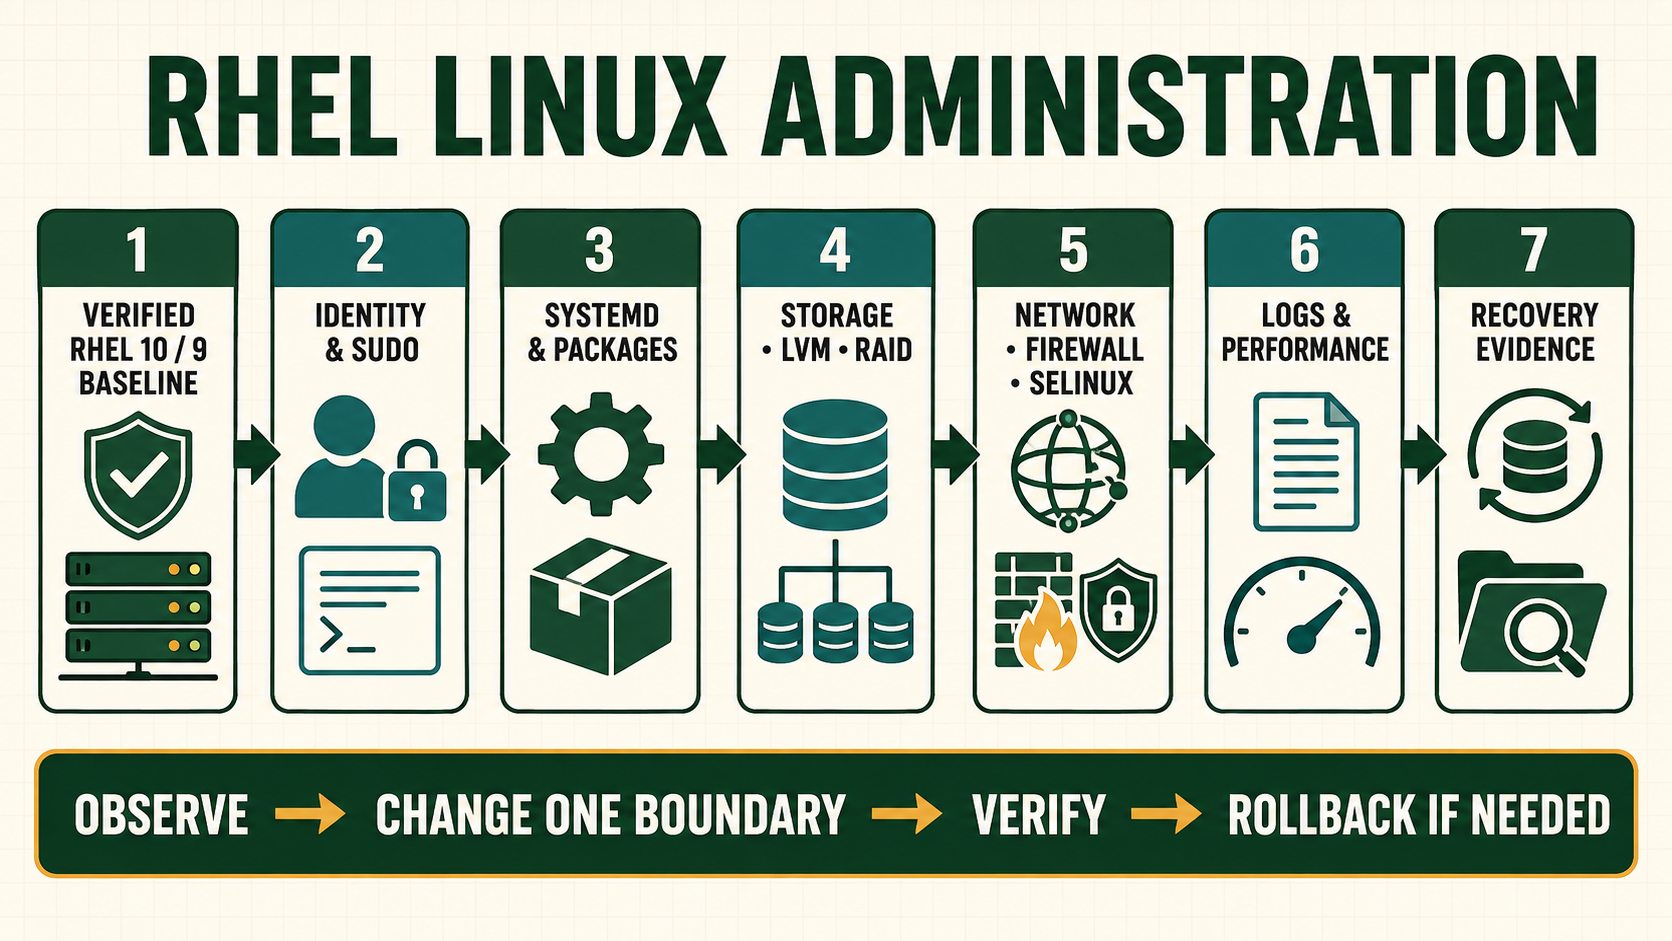
Installing RHEL is the first administration project. This tutorial begins before the installer opens and ends only after the new server survives a reboot, reaches approved repositories, reports synchronized time, keeps SELinux enforcing and produces a repeatable build record. Follow it on a disposable virtual machine first. The commands are not decoration: each one answers a specific question about identity, storage, networking, security or recovery.
Prerequisites and inherited lab checkpoint
This lesson assumes no prior RHEL installation experience. You need a Red Hat account with access to RHEL, a computer capable of running a 64-bit virtual machine, at least 4 GiB of spare RAM, two CPU threads, 60 GiB of free disk space and a stable Internet connection. A physical-server installation also requires console access and an approved target disk.
The primary lab uses RHEL 10 in a virtual machine because snapshots make mistakes recoverable. RHEL 9 remains a supported comparison path; where an installer screen or command differs, verify the installed major release before copying a value. AlmaLinux and Rocky Linux can be useful practice systems, but they are not substituted silently for RHEL in certification preparation.
Prepare a written lab sheet with the VM name rhel10-lab01, hostname servera.example.test, 4 GiB RAM, two virtual CPUs, one 60 GiB virtual disk, UEFI firmware, NAT networking and the administrative user student. The reserved example.test domain prevents the tutorial from claiming a real organization’s namespace.
Install and prepare the required components
sha256sum rhel-10.x-x86_64-dvd.iso
# Windows: Get-FileHash .\rhel-10.x-x86_64-dvd.iso -Algorithm SHA256
# macOS: shasum -a 256 rhel-10.x-x86_64-dvd.iso- Replace the ISO filename with the exact downloaded file. Compare the result with Red Hat’s displayed SHA-256 digest; calculating without comparison proves nothing.
- Use the Binary DVD architecture matching the CPU. An x86_64 image does not boot an AArch64 guest.
- Keep the first lab behind NAT and use the virtual console. Bridged networking exposes the unfinished host to the local network.
- Disconnect unrelated removable or passthrough disks before a physical installation and preserve a verified backup of required data.
Complete interactive installation, first boot and Kickstart workflow
Step 1: obtain the correct installation image
Download the RHEL 10 x86_64 Binary DVD ISO from the authenticated Red Hat download area. The DVD image contains BaseOS and AppStream packages and is the simplest beginner source. A boot ISO is smaller but needs a working network installation source. Select ARM only when the virtual or physical CPU is AArch64.
Record the displayed filename, architecture, release and SHA-256 digest in the lab sheet. Do not trust a filename alone. A renamed, incomplete or modified image can still end in .iso.
Step 2: verify image integrity on Linux, Windows or macOS
# Linux
sha256sum rhel-10.x-x86_64-dvd.iso

# Windows PowerShell
Get-FileHash .\rhel-10.x-x86_64-dvd.iso -Algorithm SHA256

# macOS
shasum -a 256 rhel-10.x-x86_64-dvd.iso
Compare every character with the digest displayed by Red Hat using a separate trusted browser session. “The command printed a hash” is not success. Success means the calculated value exactly equals the authoritative value. A mismatch requires a fresh download; never disable the check to save time.
Step 3: create the learning virtual machine
- Create a new 64-bit Linux VM named
rhel10-lab01. - Choose UEFI firmware. Secure Boot may remain enabled when supported by the hypervisor.
- Assign two vCPUs and 4 GiB RAM. Do not assign so much that the host begins swapping heavily.
- Create a dynamically allocated 60 GiB virtual disk. Dynamic allocation changes host consumption, not the guest’s reported capacity.
- Attach the verified DVD ISO to the virtual optical drive.
- Select NAT networking for the first build. It gives outbound access without intentionally exposing the VM to the local network.
- Record the virtual disk identity and take a powered-off “empty VM” snapshot if the hypervisor supports it.
KVM/libvirt users can inspect capabilities with virt-host-validate and create the VM through virt-install. VMware Workstation, Hyper-V and VirtualBox users should make equivalent resource choices. Button labels differ, but CPU, memory, firmware, disk, ISO and network decisions are the same.
Step 4: boot and verify the installation medium
Start the VM and select Test this media and install Red Hat Enterprise Linux. The media test reads the installation image before Anaconda begins. If the graphical display is unusable, edit the boot entry only after recording the original line; inst.text selects text mode and inst.resolution=1024x768 requests a specific graphical resolution.
A physical USB write is destructive to the selected device. Resolve the device by model, capacity and serial before using any image-writing tool. Never demonstrate dd against an unresolved /dev/sdX; the wrong target can erase the workstation’s system disk.
Step 5: understand the Anaconda Installation Summary
Anaconda collects choices before writing the disk. Work through Localization, Software, System and User Settings deliberately:
- Language and keyboard: select the working language and test special characters used in passwords and shell commands.
- Time and date: select the correct region, enable network time and later verify UTC correlation with
timedatectlandchronyc. - Installation source: confirm the verified local DVD is detected and package metadata loads.
- Software selection: choose Minimal Install for the command-line administration lab. A GUI is not required to learn server administration.
- Installation destination: select only the 60 GiB lab disk. A selected disk is a destruction boundary.
- Network and hostname: enable the virtual NIC and set
servera.example.test. The lab DNS domain is illustrative; public DNS is not created. - Root account: lock direct root login for the routine lab workflow.
- User creation: create
student, select administrator privileges, and use a unique lab password that is not reused elsewhere.
Step 6: choose a storage design instead of accepting mystery defaults
For the 60 GiB UEFI lab, use automatic partitioning for the first installation, then inspect what Anaconda created. The next storage lesson repeats the build with custom partitioning. A typical result includes an EFI System Partition, a non-LVM /boot partition, an LVM physical volume, a root logical volume and swap. Exact sizes can vary by release and available memory.
| Scenario | Example design | Reason | Trade-off |
|---|---|---|---|
| First 60 GiB VM | Automatic partitioning, XFS root and swap | Learn the installer and inspect a supported baseline | Less control over growth and failure isolation |
| 100 GiB application server | 2 GiB /boot; LVM with 30 GiB /, 20 GiB /var, 10 GiB /home, swap and free extents | Separates variable application data and preserves growth space | More capacity decisions and mount dependencies |
| 500 GiB log-heavy server | Separate /var/log sized from measured retention, plus remote logging | Prevents logs from consuming the root filesystem | A small log filesystem can itself cause service failure |
Do not copy fixed sizes into production. Size from workload, retention, backup and recovery requirements. Encryption with LUKS protects data at rest but introduces key custody and unattended-boot decisions; it receives its own lab.
Step 7: review and begin installation
Before selecting Begin Installation, read the destructive-action warning and verify the selected virtual disk one final time. Installation should show package and bootloader progress without unresolved errors. When prompted, reboot and detach the ISO so the VM boots from its installed disk rather than returning to the installer.
Step 8: complete first login without using root for daily work
Log in as student. Confirm privilege escalation before closing the console:
id
groups
sudo -v
sudo id
sudo -l
id should show the student identity and membership that permits administrative access. sudo id should show effective UID 0 after authentication. If sudo fails, keep the console open and correct group or policy ownership; do not enable unrestricted remote root login as a shortcut.
Step 9: register and update through an approved method
RHEL needs an entitled content path for supported updates. A personal developer subscription, organization activation key, Satellite or cloud-provided repository may own this step. Do not place account passwords or activation keys in an article, shell history or Kickstart file.
# Inspect before registration
sudo subscription-manager identity
sudo subscription-manager status

# Organization-managed example; obtain both values securely
sudo subscription-manager register \
  --org="YOUR_ORG_ID" \
  --activationkey="YOUR_ACTIVATION_KEY"

sudo subscription-manager repos --list-enabled
sudo dnf repolist
sudo dnf upgrade --refresh
The placeholders come from the organization’s Red Hat subscription administrator and must be supplied through its secret-handling process. A successful registration returns a system identity. An empty repository list after registration is a content-policy problem, not permission to add an unknown mirror.
Step 10: establish the first verifiable baseline
date -u --iso-8601=seconds
cat /etc/redhat-release
uname -r
hostnamectl
timedatectl
chronyc tracking
lsblk -o NAME,TYPE,SIZE,FSTYPE,MOUNTPOINTS
findmnt --verify
nmcli connection show --active
ip -brief address
ip route show
getenforce
sudo firewall-cmd --get-active-zones
sudo systemctl --failed
sudo ss -lntup
sudo dnf check-update || test $? -eq 100
Healthy evidence means the expected release boots from disk, time is synchronized, required filesystems are mounted, one intended NetworkManager profile owns the address and default route, SELinux is enforcing, no unexplained critical unit failed, and only expected sockets listen. dnf check-update returning 100 means updates are available, not that DNF crashed.
Step 11: reboot as an acceptance test
A configuration that works only before reboot is unfinished. Record the first baseline, reboot from the console, then repeat hostname, kernel, mount, network, time, firewall, SELinux and failed-unit checks. Confirm the ISO is detached and the expected boot entry is used. Only after this test should the VM become the starting snapshot for later lessons.
Step 12: build a separate Kickstart automation lab
After completing the interactive build, inspect root-only /root/anaconda-ks.cfg. It can contain password hashes and installation details, so do not publish or commit it. Create a sanitized Kickstart for a disposable second VM:
#version=RHEL10
text
lang en_US.UTF-8
keyboard --xlayouts='us'
timezone UTC --utc
network --bootproto=dhcp --device=link --activate --hostname=serverb.example.test
rootpw --lock
user --name=student --groups=wheel --password=REPLACE_WITH_STRONG_HASH --iscrypted
firewall --enabled --service=ssh
selinux --enforcing
bootloader --append="crashkernel=auto"
zerombr
clearpart --all --initlabel
autopart --type=lvm
reboot

%packages
@^minimal-environment
chrony
%end

%post --log=/root/ks-post.log
systemctl enable chronyd
%end
Unsafe: clearpart --all erases every installer-visible target selected by the Kickstart context. Use it only in a disposable VM whose disk identity has been verified. Generate the password hash interactively with an approved tool, replace the placeholder locally, protect the file, and never reuse the lab secret.
sudo dnf install -y pykickstart
ksvalidator -v RHEL10 /path/to/lab.ks
ksvalidator checks supported syntax and deprecated options; it does not execute or validate scripts, storage safety, package availability or the final system. The only complete validation is an installation on a disposable target followed by the same reboot acceptance checks.
Verify the working path
cat /etc/redhat-release
uname -r
hostnamectl
lsblk -f
findmnt --verify
timedatectl
chronyc tracking
nmcli connection show --active
ip route
getenforce
sudo firewall-cmd --get-active-zones
sudo systemctl --failed
sudo ss -lntup
sudo subscription-manager identity
sudo dnf repolist- Run the verification once before and once after reboot. Persistent state, not the installer session, is the acceptance target.
- Investigate every unexpected listener and failed critical unit. An empty failed-unit list does not prove the application workload is healthy.
- If registration is intentionally omitted in a disconnected lab, document the approved repository source rather than reporting the host as fully patched.
- Save outputs with UTC timestamps but remove subscription identifiers, addresses and other environment-specific values before sharing them.
Production decisions before continuing
| Decision | Choose deliberately | Evidence to retain |
|---|---|---|
| Installation source | DVD, network tree, Satellite, Image Builder or cloud image must have a named trust and update owner. | Image digest, repository identity and build record |
| Storage | Size filesystems and LVM free space from workload, logs, updates, backup and recovery needs. | Capacity model and rebooted mount evidence |
| Encryption | Decide LUKS key custody, unattended boot and recovery before enabling it. | Recovery key procedure and tested boot |
| Registration | Use personal developer entitlement only for eligible learning; production uses the organization’s approved subscription path. | System identity and enabled repository record |
| Automation | Treat Kickstart as destructive infrastructure code with review, protected secrets and disposable testing. | ksvalidator output plus successful clean install |
Know what this installation proves and what comes next
This lesson produces a minimal RHEL server and evidence baseline. It does not yet harden SSH, design application storage, build advanced networking or configure services. Those tasks inherit this snapshot and make one bounded change at a time.
The graphical installer and Kickstart solve different problems. Interactive Anaconda teaches each decision and creates a reference anaconda-ks.cfg. Kickstart makes reviewed decisions repeatable at scale. Neither replaces post-install configuration management, patch policy, monitoring or backup.
RHEL 9 learners can follow the same operating model, but must use RHEL 9 media, documentation and ksvalidator version. Do not validate a RHEL 9 file as RHEL 10 and assume deprecated directives remain safe.
Build the working model
| Layer | Question to answer | Evidence |
|---|---|---|
| Supply chain | Which authoritative image and repositories create the server? | Matching SHA-256, signed packages and approved source |
| Platform | Which CPU, firmware, memory, disk and network does the guest receive? | VM definition and guest inventory |
| Installer | Which Anaconda choices affect storage, identity, security and boot? | Installation summary and sanitized Kickstart record |
| Persistent system | Do boot, mounts, network, time, SELinux and firewall survive reboot? | Before/after command evidence |
| Rebuild | Can another empty VM reproduce the expected baseline? | Validated Kickstart and clean-install acceptance |
Implementation sequence
- Plan. Write the target release, architecture, VM resources, hostname, network mode, storage choice, user and recovery boundary.
- Acquire and authenticate. Download from Red Hat and compare the complete SHA-256 digest.
- Create safely. Build a NAT-connected disposable VM with one clearly identified target disk and console access.
- Install deliberately. Complete every Anaconda section, review the destruction boundary and reboot from the installed disk.
- Establish administration. Verify the named wheel user can use sudo while direct routine root access remains unnecessary.
- Register and update. Use the approved entitlement/repository path without exposing account material.
- Accept and reproduce. Verify before/after reboot, preserve a snapshot, sanitize the generated Kickstart and test automation on a second VM.
Commands and expected evidence
journalctl -b -p warning..alert --no-pager
rpm -Va --nomtime --nosize
sudo dnf history list
sudo grubby --default-kernel
sudo efibootmgr -v 2>/dev/null || true
sudo less /root/anaconda-ks.cfg
ksvalidator -v RHEL10 /path/to/lab.ksjournalctlfilters the current boot for warnings and higher priorities; review context because not every warning is a failure.rpm -Vareports differences from packaged metadata. Configuration changes may be expected; do not overwrite them blindly./root/anaconda-ks.cfgcan contain password hashes and infrastructure details. Inspect as root and create a sanitized copy before version control.efibootmgrapplies to UEFI systems and may be unavailable inside some guests. Its absence is not by itself a boot defect.
Evidence and acceptance criteria
| Evidence | Healthy result | Failure meaning |
|---|---|---|
| ISO | Calculated SHA-256 exactly matches the Red Hat value | Corrupt, incomplete or untrusted installation input |
| Boot | Installed kernel boots from the target disk after ISO removal | Bootloader, firmware mode or target selection is wrong |
| Storage | Expected filesystems, types and mounts pass findmnt --verify | Layout or persistent mount definition needs correction |
| Administration | Named user can use reviewed sudo and console recovery remains available | The operator may be locked out or relying on direct root |
| Updates | Approved repositories are visible and transactions complete | Registration, entitlement, network, proxy, DNS or time is unresolved |
| Persistence | Second-boot identity, mounts, route, time and security state match baseline | Installer-only or nonpersistent configuration remains |
Three worked installation scenarios
Scenario A: first home lab
Use a 60 GiB dynamically allocated disk, NAT, Minimal Install and automatic partitioning. The goal is repeatability and safe snapshots, not production partition optimization. Accept only after update and reboot evidence.
Scenario B: small application server
Use explicit LVM separation for /var, retain free extents for measured growth, use a named organization activation key and forward logs after the logging lesson. Restore testing determines whether the storage design is useful.
Scenario C: disconnected environment
Use verified DVD or an approved internally mirrored content source. Registration status may differ, but package provenance, update ownership and vulnerability remediation must still be documented. Never represent a disconnected unpatched host as equivalent to a current registered system.
Troubleshooting by symptom
| Symptom | Inspect first | Defensible next action |
|---|---|---|
| ISO does not boot | Architecture, firmware mode, ISO attachment and checksum | Attach the correct verified image; do not disable platform protections blindly |
| Installer sees no disk | VM controller, passthrough ownership and supported driver | Correct virtual hardware presentation before selecting another disk |
| Package metadata fails | Installation source, DNS, route, proxy, time and repository entitlement | Repair the approved content path instead of adding an unofficial mirror |
| System returns to installer | Boot order, mounted ISO and installed-disk boot entry | Detach ISO and select the reviewed installed target |
| No network after reboot | Active versus persistent NetworkManager profile, interface and route | Correct the persistent profile from console |
| Sudo fails for student | Group membership, sudoers syntax and session refresh | Use console recovery and visudo; do not open root SSH |
| Kickstart validates but installation fails | Storage target, package availability, scripts and installer logs | Debug on a disposable VM; syntax validation is not execution |
Unsafe operations and recovery boundaries
- Unsafe: raw image writers and Kickstart
clearpart --allcan destroy the wrong disk. Resolve model, serial, capacity and VM ownership before execution. - Unsafe: placing activation keys, passwords or reusable password hashes in Git, screenshots or public Kickstart examples exposes access material.
- Unsafe: disabling SELinux or firewalld to make a baseline “work” removes the evidence needed to correct policy and exposure.
- Unsafe: cloning a VM without regenerating machine identity and SSH host keys makes inventory and trust ambiguous.
Rewritten knowledge checks
Cumulative lab: build servera manually and serverb automatically
- Create the lab sheet and record host capacity, VM settings, selected release, ISO filename and matching SHA-256 evidence.
- Install
servera.example.testinteractively with Minimal Install, automatic storage, NAT, locked root and a wheel administrator. - Register through the approved path, update the system and record enabled repositories without recording credentials.
- Capture the complete baseline, reboot and capture it again. Explain every difference.
- Sanitize
anaconda-ks.cfg, validate the resulting RHEL 10 Kickstart and identify its destructive directives. - Install
serverb.example.teston a second disposable VM using the reviewed Kickstart. - Run the same acceptance checks on serverb and document whether the two builds are functionally reproducible.
- Take a clean snapshot only after both positive and failure checks are understood; this becomes the inherited checkpoint for the shell lesson.