by Anil Jalela | Dec 13, 2022 | Linux
In IT, developers or System admin needs large files for multiple reasons.
==> create swap files
==> Check hard disk write speed
==> Internet and LAN speed check
==> Chek development functionality (upload/download speed and limit,)
Commands are used to create a file.
(1) xfs_mkfile
(2) dd
(3) head
(4) fallocate
head -c 10G </dev/urandom > myfile
Swap space in Linux is used when the amount of physical memory (RAM) is full. If the system needs more memory resources and the RAM is full, inactive pages in memory are moved to the swap space. Swap space can be a dedicated swap partition (recommended), a swap file, or a combination of swap partitions and swap files. Note:- Btrfs does not support swap space.
To create a swap file, use the dd command to create an empty file. To create a 1GB file, type:
dd if=/dev/zero of=/swapfile bs=1024 count=1024000
dd is a command for converting and copying a file.
if=/dev/zero or if=/dev/null read from FILE instead of stdin.
of=/swapfile is the name of the swap file.
bs=1024 read 1024 bytes from /dev/zero and write into the /swapfile.
count=1024000 count of 1024000 is the size in kilobytes (i.e. 1GB).
Prepare the swap file using mkswap just as you would a partition, but this time uses the name of the swap file:
mkswap /swapfile
swapon, swapoff – enable/disable devices and files for paging and swapping.
swapon /swapfile.
The /etc/fstab entry for a swap file would look like this:
/swapfile none swap sw 0 0
In the last fire, mount -a to mount all the unmounted filesystems and check free -g to check whether your swap file is mounted or not.
by Anil Jalela | Nov 30, 2022 | Linux
VPC:-
| VPC |
A Virtual Private Cloud is a Virtual Network that closely resembles traditional Networking that you Operate in your Own Data Centre, with the Benefits of Using the Scalable Infra- Structure of Aws.
OR
UPC is a Virtual Network or Data Centre inside AWS for One Client.
→ It is logically Isolated from Other Virtual – N/W in the AWS Cloud → Max. 5 VPC Can be Created and 200 Subnets in 1 VPC.
→ We Can allocate max. 5 Elastic IPs.
→ Once We Create VPC, DHCP, NACL, and Security-Group will be automatically created.
→ A VPC is confined to an aws region and does not extend between regions.
→ VPC exists in the region, not in the availability zone.
→ subnet created in an availability zone, not in a region.
→ the same subnet you cannot use in 2 availability zone.
→ One subnet cannot extend in 2 availability zone.
→ subnet is availability zone specific and VPC is region specific.
→ Once the VPC is created, you cannot change its CIDR Block Range.
→ If you need a different CIDR Size, Create a New VPC.
→ The different Subnets within a VPC Cannot Overlap.
→ You Can however expand your VPC CIDR By adding New / Extra IP address ranges (Except Gor Cloud & Aws China).
Step to create VPC: –
create VPC.
create subnet.
create an internet gateway.
create a routing table.
Components of VPC: –
→ CIDR & IP address subnets.
» Implied Router & Routing Table.
» Internet Gateway.
» Security Groups.
» Network ACL.
» Virtual Private Gateway.
» Peering Connections.
» Elastic IP. |
VPC Type:-
| Default VPC |
Default VPC: –
→ Created in Each AwS Region when an AWS Account is Created.
→ Has default CIDR, Security Group, NACL, and Route Table Settings.
→ Has an Internet Gateway by default. |
| Custom VPC |
Custom VPC: –
Is a VPC an AWS account Owner Creates.
→ AWS User Creating the Custom VPC Can decide the CIDR.
→ Has its own default Security Group, Network ACL, and Route Tables.
→ Does not have an Internet Gateway by default, one needs to be Created if Needed. |
Subnet: –
| Public Subnet |
→ If a Subnet’s traffic is Routed to an Internet Gateway, the Subnet: is known as a Public Subnet! If you want Your instance in a Public Subnet to Communicate with the internet Over IPv4, it must have a public IPv4 address or an Elastic IP address. |
| Private Subnet |
→ If a Subnet does not have a route to the internet gateway, the Subnet is known as a Private Subnet.
→ When you Create a VPC, you must specify an IPv4 CIOR Block for the VPC. The allowed blockSize is Between /16 to /28 netmask.
→ The first four & Last IP addresses of – Subnet Cannot be assigned.
for eg –
10.0.0.0 → Network address.
10.0.0.1→ Reserved by Aws for the VPC Router.
10.0.0.2 Reserved by Aws: The IP address of the DNS server.
10.0.0.3 Reserved for Future Use.
10.0.0.255 → Broadcast Address Aws does not support Broadcast in a VPC But Reserve this Address. |
Route & Route table: –
| Route & Route table |
→ It is the Central Routing function.
→ It Connects the different AZ together and Connects the VPC to the Internet Gateway.
→ You Can have up to 200 Route tables per VPC.
→ You Can have up to 50 Routes Entries per Route Table.
→ Each Subnet must be associated with Only One Route table at any given time.
→ If you do not Specify a Subnet to Route table association, the Subnet will be associated with the default VPC Route table.
→ You Can also edit the Main Route table if you need, but you cannot delete the main Route Table.
→ However you Can make a Custom Route table manually become the main Route Table then delete the former main, as it is no longer the main Route table.
→ You can associate multiple Subnets with the same Route table. |
Internet Gateway: –
| Internet Gateway |
→ An Internet Gateway is a Virtual Router that connects a VPC’ to the internet.
→ Default VPC is already attached with – an Internet Gateway.
→ If you Create a new VPC then you must attach the Internet Gateway in order to access the Internet.
→ Ensure that your subnet’s Route table points to the Internet Gateway.
→ It performs NAT Between your private and Public IPv4 address.
→ Its Supports both IPv4 and IPv6. |
Net Gateway:-
| Net Gateway |
You Can Use a Network address translation Gateway to enable instances in a private Subnet to Connect to the internet or Other AWS Services, but prevent the internet from initiating a Connection with those instances.
→ You are charged for Creating and Using a NAT Gateway in your account NAT Gateway hourly Usage and data processing rates apply Amazon EC2 Charges for data transfer also apply.
→ To Create a NAT Gateway, you must Specify the public Subnet in which the NAT Gateway should Reside.
→ You must also specify an Elastic IP address to associate with NAT Gateway When you create it → No need to assign a public IP address to your Private instance.
→ Net Gateway is always present in public Networks not in private networks. But it works for private networks to access the internet.
→ After you have created a NAT Gateway You must update the Route Table associated with one or more of your Private Subnets to point Bound Internet traffic to the NAT Gateway. This enables instances in your private Subnet to Communicate with the internet.
→ Deleting a NAT Gateway, disassociates its Elastic IP address but does not release the address from your account. |
Security Groups:-
| Security Groups |
→ It is a Virtual Firewall Works at ENI Level.
→ Upto 5 Security Groups per EC2 instance interface can be applied.
→ Can Only have permit Rules, Cannot have denied Rules.
→ Stateful, Return traffic, of allowed inbound traffic is allowed, even if there are no rules to allow it.
→ Security Groups work with Ec2 instance but NACL works with VPC. |
Network ACL:-
| Network ACL |
→ It is a function performed on the Implied Router.
→ NACL is an optional Layer of Security for your VPC that acts as a ? firewall for Controlling traffic in and Out of One or more Subnets.
→ Your VPC automatically Comes with a modifiable default Network ACL By default, it allows all inbound and Outbound IPv4 traffic and if applicable, IPv6 traffic.
→ You Can Create a Custom network ACL and associate it with a Subnet By default, Each Custom Network ACL denies all inbound and Outbound traffic until you add rules.
→ Each subnet in your VPC must be associated with a Network ACL of you don’t explicitly associate the Subnet with a Network ACL, the Subnet is automatically associated with the default Network ACL.
→ You Can associate a Network ACL with multiple Subnets, however, a Subnet Can be associated with Only One network ACL at a time. When you associate a Network ACL with a Subnet, the previous association is Removed.
→ A network ACL Contains a Numbered list of Rules that we evaluate in order, starting with the lowest numbered Rule.
→ The highest number that you can use for a Rule is 32766 Recommended that you start by Creating Rules with Rule Numbers that have a multiple of 100 so that you can insert new Rules where you need them later.
→ It functions at the Subnet Level.
→ ANACL is stateless, Outbound traffic for allowed inbound traffic must be explicitly allowed too.
→ You Can have the permit and deny Rules in an NACL. |
Diff SG&NACL:-
| Security Group
→ Operate at the Instance level.
→ Support allows rules only.
→ stateful, Return traffic is automatically allowed.
→ Applies to an instance only. |
NACL
→ Operate at the subnet level.
→It permits allow as deny rule.
→stateless, Return traffic must be explicitly allowed by rule.
→Applies to all instances in the subnet. |
VPC Peering:-
| VPC Peering |
→ A VPC Peering Connection is a Networking Connection between two VPCs that enables you to route traffic between them Using Private IPv4 addresses or IPv6 addresses.
→ Instances in either VPC Can Communicate with Each Other as if they are within the same Network.
→ You Can Create a UPC Peering Connection Between your Own VPC, or with a VPC in another Aws Account. The VPC Can be in different Regions. |
by Anil Jalela | Nov 28, 2022 | Linux
EC2 Access:-
| EC2 Access |
→ To access instances, you need a key I and Key pair Name.
→ You Can download the Private key Only Once.
→ The Public Key is Saved by AWS to match it to the Key pair name, and the Private key is when you try to login to the EC2 instances.
→ Without Key pair you Cannot access instances via RDP or SSH.
→ There are 20 EC2 instances Soft Limit per region, you Can Submit a Request to AWS to increase it. |
Ec2 Status Check:-
| Ec2 Status Check
|
→ By default AWS EC2 Service performs automated Status checks every minute.
→ This is done on every running EC2 instance to identify any Hw or software issue.
→ Status check is built into the AWS EC2 instance.
→ They Cannot be Configured, deleted, or disabled.
→ EC2 Services Can Send its metric Data to AWS Cloudwatch every 5 minutes (enabled by default).
→ Enabled detailed monitoring is Chargeable and Sends matric every 1 minute.
→ You are not charged for EC2 instances, if they are stopped, however, attached EBS Volumes incur charges. |
| When you stop an EBS Backed EC2 Instance |
→ Instances perform a Shutdown.
→ state changes from Running Stopping.
→ EBS Volumes remain attached to the instance.
→ Any data cached in RAM or instances store volume is gone.
→ Instances retain its private IPv4 or any IPv6 address.
→ Instances releases its public LPv4 address back to Aws Pool.
→ Instances Retain their Elastic IP address. |
| EC2 Termination |
→ when you terminate a Running instance the instance stakes change as follows.
Running → shutting down → Terminated.
→ During the shutting down and Terminated states, you do not incur Charges.
→ By default EBS Root Devices Volumes have been deleted Automatically when the EC2 instances are terminated.
→ Any additional (non-boot/boot) Vokimes attached to the instances by default, persist after the instance is terminated.
→ You Can Modify both behaviors by Modifying the ‘Delete on Termination’ attribute of any EBS Volumes during instances launch or while Running.
→ Enable EC2 Termination Protection against accidental Termination. |
EC2 Metadeta:-
| EC2 Metadeta
|
This is instance data that you can use to configure or manage the instance.
eg:- IPv4 addresses, [Pu6 addresses, DNS hostname, AMI-id, Instance ID, Instance Type, local hostname, public keys, Security groups.→ Metadata Can be Only viewed from within the instance itself ie you have to log in to the instance.
→ Metadata is not protected by encryption, anyone that has access to the instance.→ Can view this data To View instance Metadata, GET http://169254169254/latest/Metadata |
Instances User data:-
| Instances User data |
→ data Supplied by the User at instance launch in the form of a Script to be executed during the instance boot.
→ User data is limited to 16 KB.
→ You Can Change User data, by Stopping EC2 first.
→ User data is not encrypted. |
Elastic Block Storage (NAS)
| Elastic Block Storage (NAS) |
→ The storage is called (EBS block volume) and the instance is called EBS Backed Instance.
→ Most Common Replicate with A-Z.
→ EBS Volumes attached at launch are deleted when the instance terminates.→ EBS Volumes attached to a running instance are not deleted when the instance is terminated but are detached with data interact. |
Instance Storage (CDAS)
| Instance Storage (CDAS) |
→ Physically attach to the host Server.
→ Data not lost when os is Rebooted.Data lost when:
→ Underlying drive fails.
→ Instance is stopped or terminated.
→ You Can’t detach or attach to another.
Do not Rely on for Valuable long-term data. |
by Anil Jalela | Nov 28, 2022 | Linux
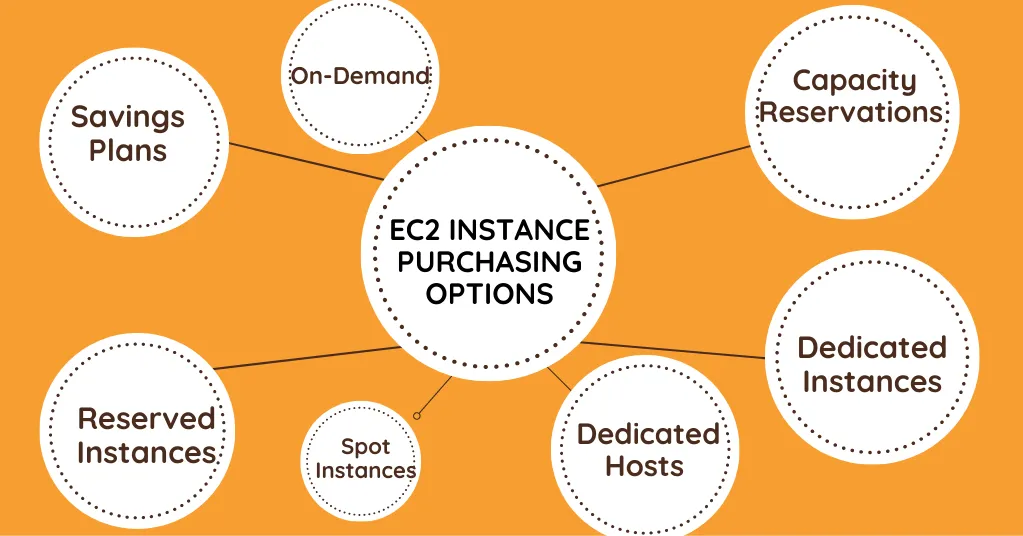
Ec2 Instance Purchasing Options
There are four ways to pay for amazon EC2 Instances ie:- On-Demand, Reserved Instance, and Spot Instance.
You can also Ply for Dedicated Host which provides you with EC2 Instance Capacity on Physical servers dedicated for your Use.
| 1 |
On-demand |
→ AWS on-demand Instances are Virtual servers that run in AWS or AWS Relational Database Service (RDS) and are purchased on a fixed Rode per Hour.
→ AWS Recommends using On-demand Instances for applications with Short term irregular workloads that Cannot be interrupted.
→ They are also Suitable for use during the testing and development of applications on EC2.
→ With On-demand instances, you only pay for the EC2 instances you use.
→ The Use of on-demand instances frees you from the Cost and Complexities of planning, purchasing, and maintaining hardware and transforms what are commonly Large Fixed Costs into much Smaller Variable Costs.
→ Pricing is per instance-hour Consumed for each instance from the time an instance is launched until it is terminated or stopped.
→ Each partial instance hour consumed will be billed per second for Linux Instances and as a full Hour for all Other Instance types. |
| 2 |
Dedicated Instance |
→ Dedicated instances are run in a VPC on Hardware that is dedicated to a Single Customer.
→ Your dedicated instances are physically isolated at the host hardware level from instances that belong to other AWS Accounts.
→ Dedicated instances may share Hardware with other instances from the Same AWS Account that is not a dedicated instance.
→ Pay for dedicated Instances On-demand Save up to 70% by purchasing Reserved instances or save up to 90% by purchasing Spot Instances. |
| 3 |
Dedicated Host |
→ An Amazon EC2 Dedicated Host is a
physical server with EC2 Instance Capacity fully Dedicated to your Use.
→ Dedicated Host can help you address Compliance requirements and Reduce costs by allowing you to use your existing Server Bound Software licenses.
→ Pay for a Physical Host that is fully dedicated to Running Your Instances, and bring your existing per-Socket, per-Core per-VM Software license to Reduce Cost. |
| 4 |
Schedule Instance |
→ Schedule Reserve Instances enable you to purchase Capacity Reservations that recur on a daily, weekly, or monthly basis, with a specified Start time and Duration, for a One-Year term.
→ You Reserve the capacity in advance So that you know it is available When you need it. You pay for the time that the instances are Scheduled, even if You do not use them.
→ Schedule instances are a good choice for Workloads that do not run Continuously, but do run on a regular Schedule.
→ Purchase instances that are always available on the Specified Recurring Schedule, for a one-year term.
for eg:- You Can use Schedule instances for an application that runs during business hours or for Batch Processing that Runs at the end of the Week. |
| 5 |
Reserved Instance |
→ Amazon EC2 RI provides a significant discount (up to 75%) Compared to On-demand pricing and provides a Capacity Reservation when Used in a Specific Availability Zone.
→ Reserved instances give you the option to Reserve a DB instance for a one or three-year term and in turn receive a significant discount Compared to the On-demand Instance pricing for the DB instances.
→ Standard RI:- These provide the most significant discount (up to 75% of on-demand) and are Best Suited for steady-state – State Usage.
→ Convertible RI:- These provide a discount up to 54%) and the Capability to change the attributes of the RI as long as the Exchange Results in the Creation of Reserved instances of greater or equal value.
Schedule RI:- These are available to launch within the time window you Reserve. |
| 6 |
Sot Instance |
→ Amazon EC2 Spot Instances let you take advantage of unused Ec2 Capacity in the AWS Cloud Spot Instances are available at up to 90% discount Compared to On-demand prices
→ You Can use Spot – Instances for various test & Development Workloads.
→ You also have the Options to hibernate, Stop or terminate your Spot instances when EC2 Reclaims the Capacity Back with two minutes of notice.
→ When Would my Spot Instance get interrupted?
The primary reason would be Amazon EC2 Capacity Requirement (eg-On-demand or Reserved instances) Secondarily if you have chosen to set a ‘max. spot price and the spot price rises above this |
by Anil Jalela | Nov 28, 2022 | Linux
EC2:-
→ Amazon Ec2 provides Scalable Computing Capacity in the Aws Cloud.
→ You Can Use Amazon EC2 to launch as many or as few Virtual Servers as you need, Configure Security and networking, and manage Storage.
→ Amazon EC2 enables you to scale up or – Scale down the instance.
→ Amazon EC2 is having two storage options ie EBS & instance store.
→ Pre Configured templates are available known as Amazon Machine Image.
→ By default, when you create an EC2 account with amazon, your account is limited to a maximum of 20 instances per EC2 Region with two default High Iso instances.
Types of EC2 Instances :-
General Purpose:-
| 1 |
General Purpose
Available in four sizes:- Nano, Small, medium, and Large but not all.
A-Series:-(A1) medium and large only
M-Series:-(M4, M5, M5a, M5ad, M5d)
T-Series:-(T2,T3,T3a)
|
Balanced Memory & CPU
|
General-purpose instances provide a balance of computing memory and networking resources and can be used for a variety of workloads.
A1–Instances:- Al-instances are ideally suited for Scale-Out Workloads that are supported by the Arm Ecosystem. These instances are well-suited for the following Application Webserver.
Containerized micro Services.
Caching fleets.
Distributed data Stores.
An application that requires Arm Instruction Set.
IM4, M5, M5a, M5ad and M50.
M4 Instance: – The New My instances feature a Custom Intel Xeon E5-2676 v3 Haswell processor Optimized Specifically for EC2
VCPU 2 to 40 (Max.).
RAM 8GB to 160 GB (Max.).
Instance Storage EBS Only.
M5, M5a, M5ad, and M5d Instances: These instances provide an ideal Cloud infra, offering a Balance of Compute, memory, and Networking Resources for a Broad Range of applications Used in – Gaming Servers, Web Server Small and Medium databases
VCPU 2 to 96 (max.).
RAM – 8 to 384 (Max.).
Storage EBS & NVMe, SSD.
T2, T3 and T3a Instances
1 These instances provide a baseline level of CPU Performance with the ability to burst to a higher level When Required by Your Workload!
→ An Unlimited Instances Can Sustain high CPU Performance for any period of time Whenever Required
Used for :
1) Website and Web App.
2) Code Repositories.
3) Development, build test.
4) Microservices
VCPU 2 to 8 (max.).
RAM – 0.5 to 32 (Max.)
|
Compute Optimized:-
| 2 |
Compute Optimized
Three types are Available C4, C5, C5n (C3 Previous Instance )
|
More CPU than RAM |
Compute Optimized Instances (C-Series)
Compute Optimized Instances are Ideal for Compute-bound application’s that benefit from high-performance processors.
Three types are Available C4, C5, C5n (C3 Previous Instance )
C4-instances:- C4 instances are optimized for Compute intensive Workloads and deliver Very Cost effective high performance at a low price per Compute Ratio.
VCPU 2 to 136
RAM – 3.75 to Go GB
Storage – EBS Only
Network BW – 10 Gbps
Use Cases –Web Server, Batch Processing, MMO Gaming, Video Encoding
C5 instances:- C5 is Optimized for compute-intensive Workloads and delivers Cost-effective high performance at
a low price per Compute Ratio.
Powered by AWS Nitro System.
VCPU 2 to 72
RAM + 4 to 192 GB
Network B.W → Up to 25 Gbps
Instance Storage – EBS Only & NVMe SSD.
High-performance Web Server, Gaming, and Video Encoding.
Note:-
C5 supports a max of 25 EBS volume.
C5 uses an Elastic Network Adapter.
C5 uses a new EC2 Hypervisor. |
Memory Optimized:-
| 3 |
Memory Optimized
Memory Optimized
R Series.
X-Series.
Z-Series.
Memory Optimized instances are designed to deliver fast performance for Workloads that process large data sets in Memory |
More RAM |
R4, RS, R5a, Road and R50d
→ High Performance, Relational (MySQL), and NoSQL (MongoDB, Cassandra) databases.
→ Distributed Web Scale Cache Stores that provide in-memory caching of key-value type data
→ Used in Financial Services, Hadoop.
VCPU – 2 t. 96
RAM = 1648 768GB
Instance Storage – EBS Only & Nume SSD
X1, Xle Instances
→ Well suited for High-Performance databases and Memory intensive enterprise applications, Relational Database Workload, SAP HANA.
→ Electronic Design Automation
VCPU – 4 to 128.
RAM – 122 to 3904 GB.
Instance Storage – SSD.
Zld Instance
→ High-Frequency Zid delivers a sustained all Core frequency of up to 4.0 GHz, the fastest of any cloud instances
→ AWS Nitro System, Xeon Processor, up to 1.8T8 of instances Storage
VCPU – 2 to 48
RAM → 16 to 384 GB
Storage – NVM SSD
use Cases:- Electronic Design Automation and Certain databases Workloads with high per-Core Licensing Cost |
Accelerated Computing / GPU:-
|
|
|
|
| 4 |
Accelerated Computing / GPU
Accelerated Computing
P Series.
G Series.
F Series
|
Graphics Optimized |
Accelerated Computing instance families use Hardware accelerators, or Co-processors to perform Some functions such as floating point number calculation, graphics processing, or data pattern Matching more efficiently than is possible in Software Running on CPUs
F1 Instance
→ F1 Instances offer Customizable Hardware acceleration with field Programmable Gate arrays (FPGA).
→ Each FPGA Contains 2.5 million Logic Elements and 6800 DSP engines.
→ Designed to accelerate Computationally intensive algorithms, such as data flow or highly parallel Operations.
→ F1 provider Local NVM SSD Storage.
VCPU – 8 to 64.
FPGA – 1 to 8.
RAM – 122 to 476 GB.
Storage- NUMe SSD
Used in = Genomics Research, Financial Analytics, Real-time Video Processing & Big data Search
P2 & P3 Instances
It Uses NVIDIA Tesla GPUs.
→ Provide High Bandwidth Networking.
→ Up to 32 GB of memory Per GPU which makes them Ideal for deep Learning & Computational Fluid Dynamics.
P2 Instance
VCPU + 4 to 64.
GPU 1 to 16.
RAM + 61-768GB.
GPU RAM – 12-192GB.
Network BW – 25 Gbps
Storage – SSD & EBS.
P3 Instance
VCPU – 8 to 96.
GPU – 1 to 8.
RAM 61-73298.
Storage SSD & EBS.
Used in Machine Learning, Databases Seismic Analysis, Genomics, Molecular Modeling, AI, and Deep Learning.
Note:- p3 Support CUDA9 & Open GL Apis.
P2 Supports CUDA8 and Open CL 12 G2 & G3 Instances
Optimized for Graphics Intensive application
→ Well suited for apps like 3D Visualisation
→ G3 Instances use NVIDIA Tesla M60 GPU and provide a Cost Effective, high-performance platform for Graphics applications
VCPU – 4 to 64.
GPU – 1 to 4.
RAM – 30.5 to 488GB.
GPU Memory 8 to 32 GB.
Network Performance – 25 Gbps
Used in – Video Creation Services, 3D Visualisation, and Streaming Graphics-intensive applications. |
| 5 |
Storage Optimized
I Series.
D Series.
H Series.
Storage Optimized instances are designed for Workloads that Require’ high, sequential Read and write access to very large data sets on local Storage
They are Optimized to deliver tens of thousands of Low Latency, Random I/O Operations per second CIOPS) to application
|
Low latency |
D2 instances
Well suited for the following
→ Massive Parallel Processing (MPP) data warehouse.
→ Map Reduce and Hadoop distributed Computing.
→ Log or data Processing app
VCPU — + 4 to 36.
RAM — 30.5 to 244 GB.
storage — SSD.
H1 Instances
This family features up to 16 TB of HDD Based local storage, high disk throughput, and a balance of computing & Memory.
→ Well suited for App Requiring Sequential access to large amounts of data on direct-attached instance storage.
→ Application that requires high throughput access to large quantities of data
vCPU – 8 to 64.
RAM – 32 to 256GB.
Storage – HDD.
I3 and I3en Instances
Well suited for=>
→ High-frequency online transaction process-ing System COLTP).
→ Relational Databases.
→ No SQL Databases.
→ Distributed File System.
→ Data Warehousing application.
VCPU 2 to 96.
RAM – 16 to 768 GB.
Local Storage – NVMe SSD.
Networking Performance – 25 Gbps to l00 Gbps.
Sequential Throughout Read – 16 GB/s Write – 6.4GB/S (I3), 8GB/S (I3en). |
| 6 |
High Memory Optimized
U Series
|
High RAM, Nitro System |
High Memory Instances
→ High Memory Instances are bare metal’ Instances and do not Run on a Hypervisor
→ Only available under Dedicate Host Purchasing Category (for 3 yr. Term)
→ OS directly on Hardware
High Memory Instances are purchased and built to run large-in-memory databases, including production developments of SAP HANA in the cloud.
Features :
Latest Generation Intel Xeon Pentium 8176M Processor
# 6, 9, 12 TB of instance Memory, the largest of any of the EC2 Instance
Powered by the AWS Nitro System, a combination of dedicated Hardware & Lightweight Hypervisor
Bare Metal Performance with direct access to host Hardware.
EBS Optimized by default at no additional Cost.
model :- U-6tb 1 metal, U-9th metal & U-12tb1 metal
Network Performance – 25 Gbps.
Dedicated EBS Bandwidth – 14 Gbps.
Each Instance offers 448 logical Processors. |
| 7 |
Previous Generation |
|
T1, M1,C1, CC2,M2, CR1, CG1, I2.Hs1, M3,C3 and R3 |
EC2 Bare Metal Instances:-
| EC2 Bare Metal Instances |
→ Non-Virtualised Environment
→ Operating System runs directly on Hardware
→ Suitable for Licensing Restricted tier-1 Business Critical Applications.
eg:- i3 metal, 15-metal, r5-metal, z1d-metal, u-6ti metal |